A fence is a structure that encloses an area, typically outdoors, and is usually constructed from posts that are connected by boards, wire, rails or netting. A fence differs from a wall in not having a solid foundation along its whole length. Alternatives to fencing include a ditch sometimes filled with water, forming a moat.
When putting up fencing, there are a few basic rules you should follow to ensure a stable and durable end result. Even though the fence posts are already treated, it’s a good idea to soak the base of the posts into wood preservative before installation.
Always use treated wood and exterior grade screws to prevent premature rotting and rusting. Even if you are installing a pressure-treated fence panel it should be raised a minimum of 50mm above the ground to help prevent rotting.
If you are installing a fence onto a sloping area, keep the fence panels along a horizontal line but fill the angled gap at the base by cutting a gravel board to size. Some heavily sloped areas will require a different method of installation, so seek specialist advice on how to build your fence in those instances.
Although it’s possible to erect a fence on your own it’s always safest to get somebody to help you.
When using Postcrete wear a dust mask, safety goggles and protective gloves, and be sure to follow the manufacturer’s instructions. Wear protective gloves when handling wood and applying wood preserver. Offcuts of timber should be disposed of safely – your local recycling centre should be able to help and advise.
- Research your property (utility locations, property lines established, municipality requirements, etc.)
- Discuss plans with neighbors
- Perform initial project review and walk through (if applicable; you may need to do this more than once if there is property preparation that needs to be done before installation)
- Grading/terrain adjustment (if applicable)
- Removal and disposal of existing fence/curbing (if applicable)
- Other specific steps (e.g. moving sprinklers, concrete work, etc., if applicable)
- Final clearance of fence line to enable crew/equipment access
- Installation walk through
- Inspection and final walk through
The huge number of styles of fences and fencing materials can be overwhelming. Wander down the fence aisle of any hardware store and you’re looking at different terms like “vinyl, ornamental aluminum, and chainlink” Then there are the half-dozen materials, which may or may not suit the needs of your yard and budget.
Vinyl Fencing
There are all sorts of quality fencing options out there for homeowners. Vinyl fencing has become quite popular in the last few years because of its affordability and versatility. Vinyl fences come in an array of great colors, interesting textures and appealing styles. No matter what type fence you prefer, there will likely be something that matches your home. Here are some details about what vinyl fencing is made of and some of the benefits of using it.
Vinyl Fencing is Made from a Long-Lasting Material
Vinyl fences are plastic, made specifically with polyvinyl chloride (PVC). This material is combined with special ingredients that make it strong, durable, and resistant to various types of weather and ultraviolet rays. Vinyl fencing is usually made in two different ways: mono-extrusion and co-extrusion. The first process uses PVC that is injected with UV inhibitors. The second process includes two layers of PVC, the first one being the UV coverage layer and the inner layer serving as impact resistance.
vinyl picket fence in front of a home. What are the Benefits of Vinyl Fencing?
Vinyl fences are extremely easy to maintain. They won’t warp, rot, or crack like a wood fence. Vinyl doesn’t chip, corrode, peel or mold. You’ll never need to refinish or paint a vinyl fence. And, of course, a vinyl fence will never fall prey to insects. These fences are easy to clean. Simply spray off dirt and debris as needed, or use a gentle soap to wash. Quality materials won’t fade or change color.
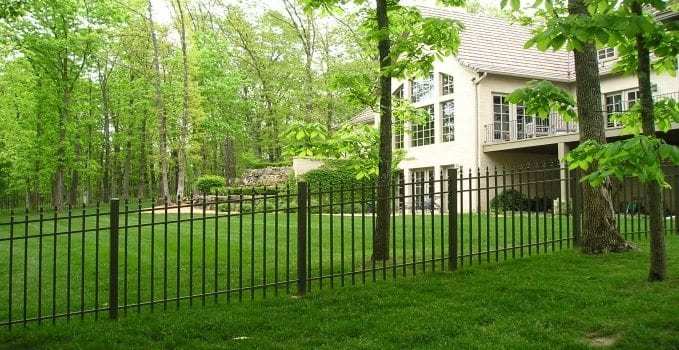
Ornamental Aluminum
If you are looking to add curb appeal to your overall space and you are concerned about looks, then ornamental aluminum fencing should be your top priority. This particular type of fencing is very appealing, decorative, and even provides security. Ornamental aluminum fencing can be done in a very simple design or it can be done in a beautiful ornamental way.
Ornamental Aluminum is one of the most popular materials used in ornamental fencing because it is corrosion resistant and relatively inexpensive to produce. It never rusts, even in the harshest of climates, making it ideal for Maryland weather patterns that often include blistering heat and humidity and the harshest of winter months. Best of all, aluminum is 100 percent recyclable with most manufacturers using substantial amounts of recycled scrap to create aluminum fencing. Steel or Iron – Steel is also a common material used in ornamental fences. A metal yard fence made from steel fencing panels offers strength, durability and a lifetime of use with very little maintenance. Made from a heavier gauge material and reinforced by concrete where posts are placed, steel fences can be treated for a different patina than aluminum fences can, giving you more options for the finish to your fence.
Chainlink
Chainlink fences are one of the most robust yet affordable types of fencing available for your home. For a modest investment you can enjoy a strong security perimeter around your property and rarely need to worry about doing any fence maintenance, which isn’t the case with other types of fence materials.
Yet chain link fences often get a bad reputation for their appearance. While this may be true to a certain extent, there are many styles of chain link fence available, allowing property owners to choose the best-looking style for their needs. In fact, there are a few styles of chain link fence that are the most popular, so check them out below:
- Galvanized
- PVC and Polymer Coatings
- Color Coatings
- Slatted Chain Link Fences
- Work Gloves
- Claw Hammer
- Tape Measure
- Post-Hole Digger
- Shovel
- Wire Cutters
- Crimping Tool
- Post Pounder
- Fence Pliers
- Circular Saw
- Chainsaw
- Tamping Tool
- Fence Tensioner
- Fence Tensioner
- Safety Goggles
Even though the fence is an often-overlooked aspect of a home, it serves a variety of useful purposes. From protecting your yard from animals and potential intruders to providing an extra barrier against inclement weather and loud neighbors, a privacy fence is a great way to ensure your property truly stays private.
Putting up a fence can require a significant amount of time and work, so it’s good idea to learn some of the basics before you begin a fence project. Get started here with our 8 steps on how to build a fence.
1 Check property lines and local building codes Select the type of fence
Don’t even think about digging up spots for your fence until you do your research. Fence construction can be highly regulated; your city, neighborhood or local homeowners association may have specific codes you need to follow. These codes typically govern certain features of your fence, such as its style or height.
In addition, you’ll also need to check and mark your property line to determine where exactly you’re able to place fencing. Refer to your home’s plat — the official map of your property that shows its boundaries and measurements. If you don’t have this on hand, you may be able to obtain a copy from your county’s clerk or surveyor.
Once you’ve done all of the research, it’s in your best interest to review your fence plans with your neighbors. Make sure you don’t build something that will be an eyesore or obstruct their view in any way.
After doing your fence code and property line research, you’re now ready to select your fence type. There are several different kinds of fences out there, but for your typical DIY privacy fence, you’re probably looking at building a fence that’s mostly constructed with prefabricated panels. In this case, you’ll need to decide on the style of fence you want to build in order to figure out what fence panel widths are available. Knowing the panel specifications will also impact how you plan and measure your fence.
2 Measure and mark the layout
The fence installation process starts with thorough measuring. Follow these steps for measuring and notating your fence layout
Measure entire fence line. Measure the entire fence line including gates. A measuring wheel can be helpful for extensive layouts. Use spray paint or chalk to outline your fence, and label gate locations.
Determine how many panels you need. Subtract the total lengths of your gates from the total fence footage, then divide this number by the panel length of your desired fence style. This will determine how many panels you need. Any remaining footage will have to be filled in with a partial panel or pickets.
Determine how many fence posts you’ll need. To gauge how many fence posts you’ll need, divide your fence length by the post spacing. Typically, you’ll want to place a post every 6 to 8 feet.
3 Gather tools and materials
With your fence measured and laid out, it’s time to gather your tools and materials. Here’s what you’ll need for building a wood fence.
- Post hole digger
- Hammer
- Power drill
- Tape measure
- Level
- Fence panels
- Fence posts
- Nails
- Screws
- Concrete mix
4 Dig holes and set posts
The fence posts need to be positioned before the rest of your fence can be constructed. Place a post every 6 to 8 feet along your fence line, making sure the distance between each post is the same.
Use a post hole digger to dig a hole that’s approximately as deep as 1/3 of the height of the fence post. For example, a 6-foot post would require a hole that’s about 2 feet deep. As you’re digging, keep an eye out for utility lines and pipes.
For each post hole, pour in about 3 to 4 inches of gravel. On top of the gravel, add about 6 to 8 inches of concrete mix. Place your post in the middle of the mixture, then plumb the post with a level to check that it’s properly positioned. Follow the instructions on your concrete mix to find out how long it should take to fully dry and set (note that this can take up to a few days).
5 Install rails to the posts
After the concrete at the base of your posts has fully set, you can begin attaching the rails to the posts. How many rails you need depends on the height of your fence. For a privacy fence, you probably will need at least three rails: one at the bottom edge of your fence, one in the middle and one on the top edge. You can attach rails with either a power drill and deck screws or just a hammer and nails.
6 Attach pickets to the rails
You can attach pickets to rails using the same drill or hammer method you used for installing the rails in step 5
Keep in mind that using panels instead of pickets will make for a much quicker and simpler building experience. Panels can usually be attached directly to the posts, taking away the hassle of installing rails and attaching pickets one at a time.
If you do decide to use panels, consider installing a removable panel somewhere along your fence. These kinds of panels can be easily detached to create a larger entryway into your yard, should you ever need to receive a large delivery to your home.
7 Install the gate
The gate is the finishing touch for your fence. If you haven’t installed your gate posts yet, you can do so in the same way you would install normal fence posts (see step 4). Once the posts are in place, grab a drill, a screwdriver, and the necessary hardware; for a basic gate, you just need screws, your chosen locking mechanism, and the right size hinges.
First, measure twice and predrill where you plan to attach the hinges on your gate section and the gate posts. Then, screw the hinges onto your gate. After that, attach the gate to your posts. Finally, install your locking hardware as recommended by the manufacturer.
Following these fence building tips can help protect your property from outside elements, but if you want full coverage, you’ll need to make sure your home insurance is up to date. See what a regular home insurance checkup can do for you.
- Inspect and Repair Each Year
- Clean Every 3 – 5 Years
- Reseal or Paint After Cleaning